
Transparent logo background: clean PNG and SVG exports
A logo has a transparent background when the area around its artwork lets the destination show through. Export PNG with transparency or SVG without a painted background, then test the actual file on light, dark and coloured surfaces. A white preview does not prove that the file contains a white rectangle.
On this page
- What does transparent actually mean?
- Which format should you choose?
- How do you distinguish a white logo from a white rectangle?
- Is the checkerboard real transparency or part of the image?
- What is the three-background test?
- Why do pale halos appear around a logo?
- What if I only have a JPG or a flattened PNG?
- How do you export a transparent logo in LogoSaga?
- Does resizing affect transparency or sharpness?
- What should you check in the destination?
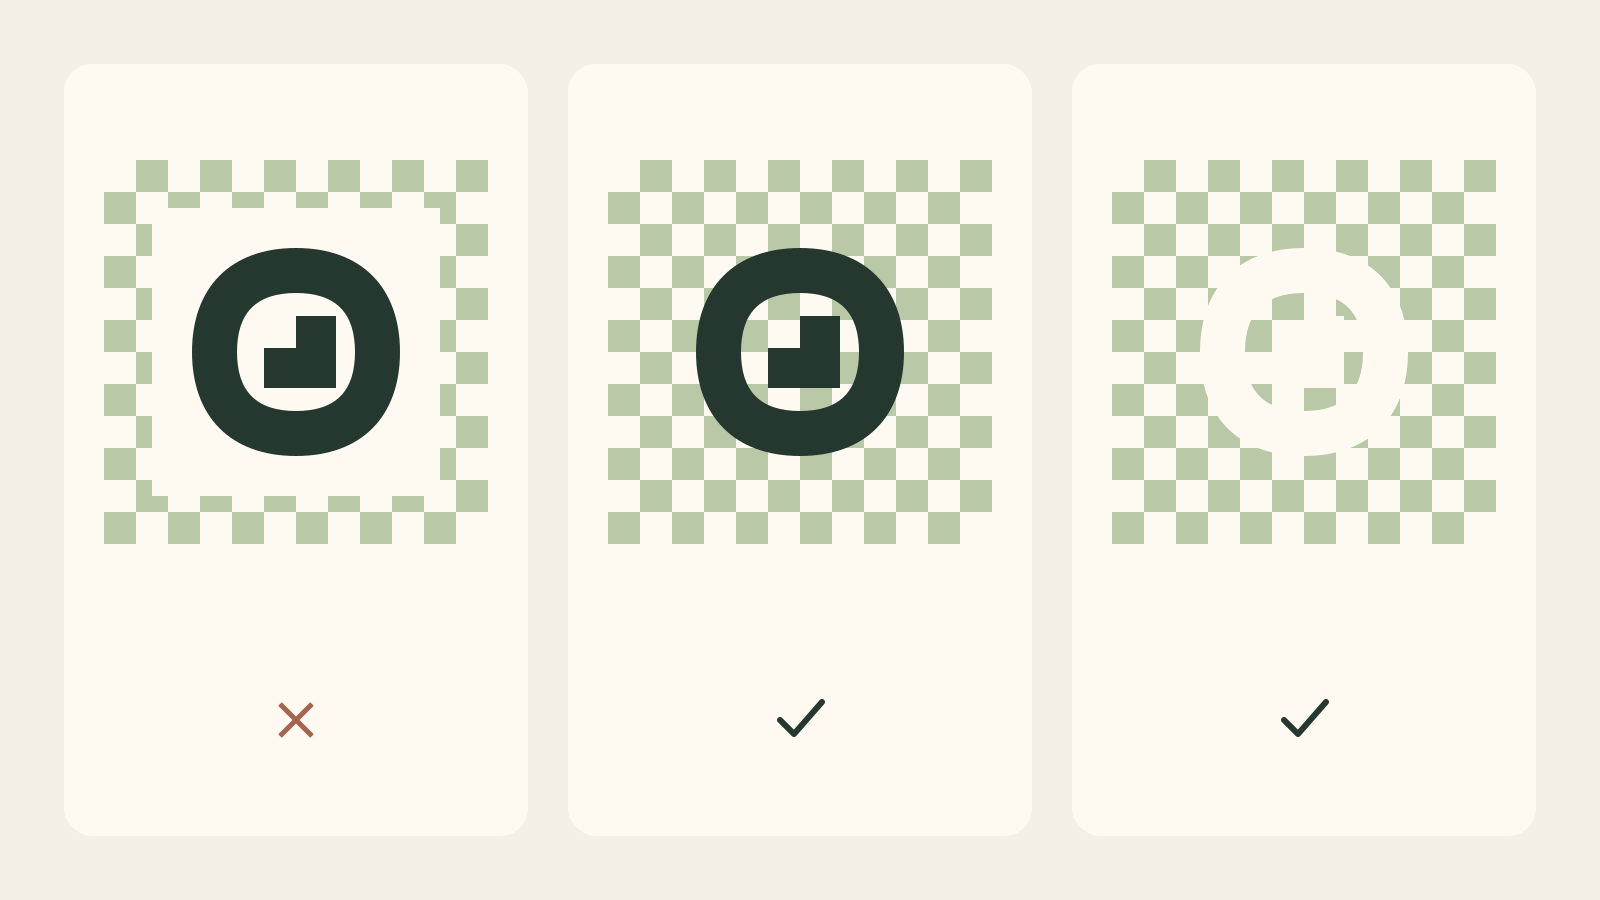
What does transparent actually mean?
Transparency controls how much of the surface beneath an image remains visible. In a PNG, this can be represented by an alpha channel, with opaque artwork, fully transparent surrounding pixels and partly transparent edge pixels. The W3C PNG specification describes PNG as a lossless raster format with optional alpha. “Optional” matters: a PNG can also contain an entirely opaque white background.
A file viewer must display transparent areas somehow. It may use a checkerboard, white, black or another preview colour. That choice belongs to the viewer and is not automatically part of the file. Think of a white window behind clear glass: the glass has not turned white merely because the surface behind it is white. Test another surface before deciding that an export failed.
Which format should you choose?
Use PNG when the destination requires a raster image and supports transparency. Keep SVG as the vector source for a logo that you may resize or export again. SVG describes vector graphics, but an SVG may still contain painted shapes covering its canvas. The extension alone cannot tell you whether a background was intentionally included.
| Format or source | Can preserve transparency? | What to check |
|---|---|---|
| PNG | Yes, when saved with transparency | Actual alpha and clean edge pixels |
| SVG | Yes, when no background is painted | Background shapes and destination support |
| JPG | No ordinary alpha transparency | Expect a solid background |
| Screenshot | Depends on how it was captured | Preview backgrounds may be baked in |
Renaming logo.jpg to logo.png does not turn white pixels transparent. Saving it as PNG without
editing those pixels does not either. Likewise, background removal does not convert a raster into
vectors. Our SVG versus PNG comparison explains the separate
decisions of transparency, resolution and editability.
How do you distinguish a white logo from a white rectangle?
A white logo can be correct artwork intended for a dark surface. On a white preview, both that artwork and its transparent surroundings may appear invisible. Place the file on dark grey: if the intended white symbol appears without a surrounding box, keep it. Do not treat every white pixel as unwanted background.
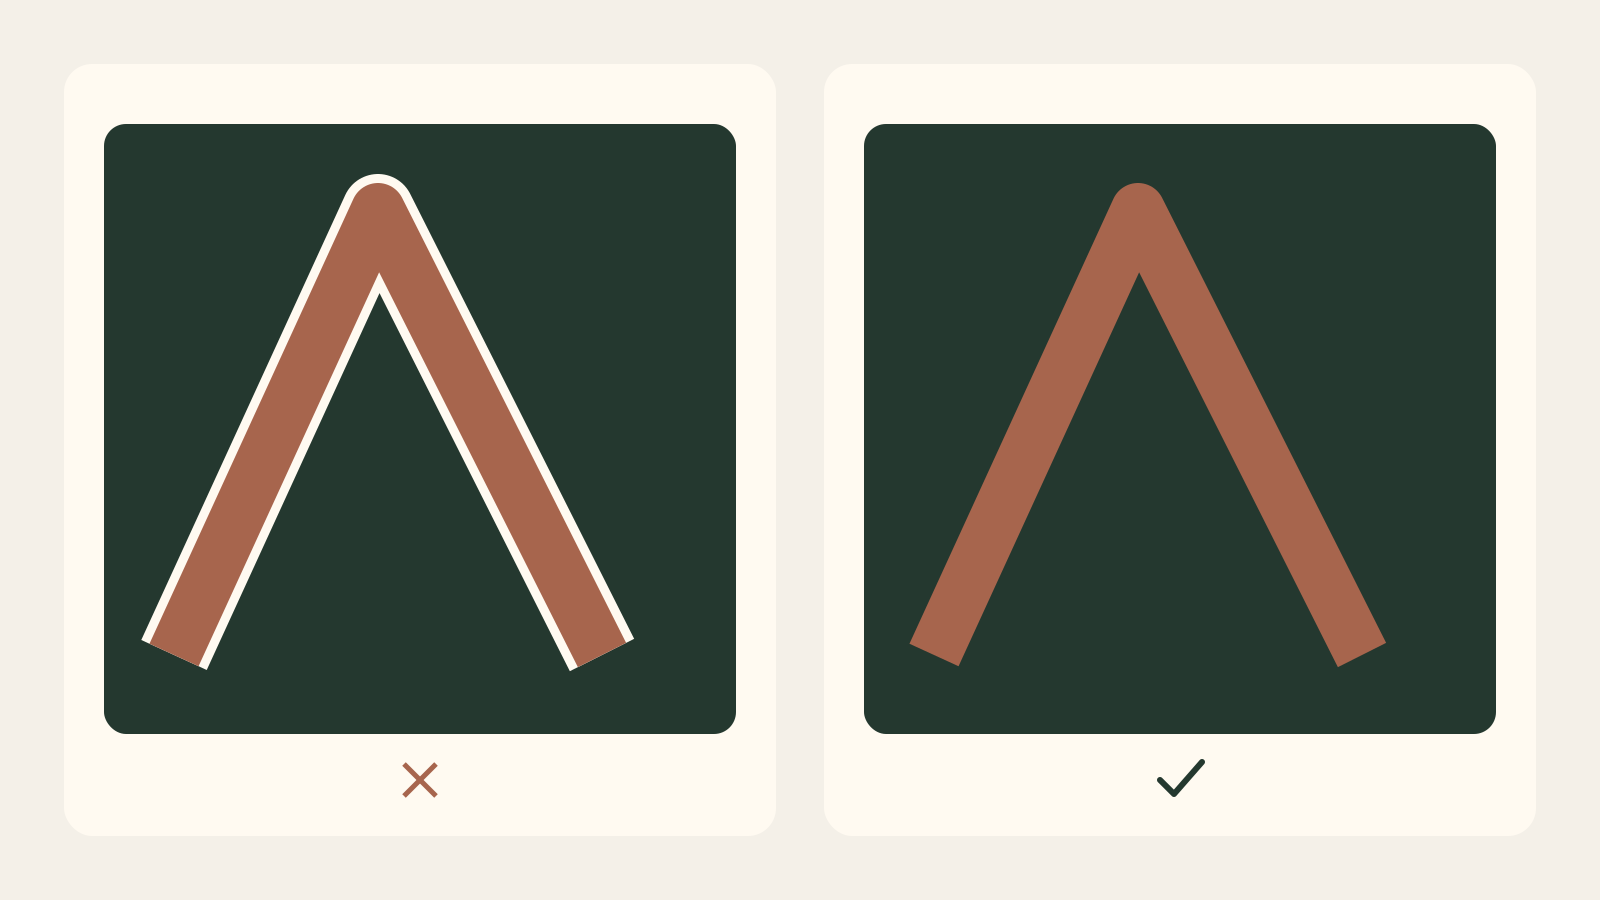
If a rectangular white area covers the dark surface, the file probably contains an opaque background. If only thin white edges appear around otherwise dark artwork, inspect the edge treatment rather than deleting the whole background again. These are three different problems: white artwork, white canvas and white contamination at the edges. Each needs a different response.
Is the checkerboard real transparency or part of the image?
Open the downloaded file in a tool that can place it above a separate background layer. Add a brightly coloured rectangle underneath it and move the logo. With genuine transparency, that colour shows between and around the shapes. With a baked checkerboard, the grey and white squares move together with the logo and hide the new surface.
A checkerboard may be flattened into a screenshot copied from a preview or into an image saved from a search result. Do not use the screenshot as the deliverable. Return to the actual download or original document. Ask a supplier for a genuinely transparent PNG or the vector original, rather than a picture of a transparent preview.
What is the three-background test?
Place the same final file on white, dark grey and a saturated colour. White exposes dark outlines and accidental shadows. Dark grey reveals pale fringes and makes intentional white artwork visible. A saturated colour makes an opaque white rectangle or a baked checkerboard easy to identify. Move and resize the file so a fixed preview surface cannot be mistaken for its pixels.
Inspect it at the size people will really see, then zoom in to examine suspect edges. A clean-looking image at 2000 pixels can have unreadable fine details at 40 pixels. Some partly transparent pixels at curves are normal smoothing, not a defect; the question is whether the edge blends cleanly across the test backgrounds without an unintended light or dark rim.
| What you see | Likely explanation | What to do |
|---|---|---|
| Whole white rectangle | Opaque background or flattened export | Return to the original; export without background |
| Grey and white squares | Checkerboard baked into pixels | Obtain the real transparent file |
| Only a pale edge | Edge colour mixed with a light surface | Re-export from vectors or repair edge colours |
| White logo vanishes on white | Correct artwork, wrong background | Use a dark surface or the other logo variant |
Why do pale halos appear around a logo?
A flattened raster can have edge colours that were blended with its old background. Removing the fully white pixels may leave the partly blended pixels behind. When placed on dark grey, those pixels form a pale fringe. The opposite can happen with a dark matte around light artwork. Increasing the canvas size does not repair this colour contamination.
The best remedy is to export again from the original vector or layered document without a background. If only the raster survives, a competent image editor can refine the mask and edge colours. Work on a copy, preserve fine strokes and inspect multiple backgrounds after each change. Aggressively deleting “nearly white” pixels can remove deliberate white elements, thin highlights and useful smoothing.
What if I only have a JPG or a flattened PNG?
Use a layered image editor, for example GIMP 3. The following is a manual raster repair; it is not a LogoSaga upload feature.
-
Work on a copy. Keep the untouched original, open a duplicate and preserve a working layer. Add an alpha channel if the layer does not already have one.
-
Select the outer background. With Fuzzy Select, click a connected area outside the logo. Adjust the threshold so the selection reaches the background without swallowing thin strokes or pale artwork. Inspect the boundary closely.
-
Add enclosed background only where appropriate. Spaces inside letters or symbols may need separate selections. Add them only if they really belong to the background; an intentional white fill is part of the logo. Use the tool’s Add to selection mode for these spaces so the outer background remains selected.
-
Invert the selection and add a layer mask. The logo should now be selected. In Add Layer Mask, initialize the mask from Selection: selected artwork stays opaque, while the unselected background becomes transparent. Do not initialize from the background selection before inverting it.
-
Refine the mask manually. Clear the selection and activate the mask thumbnail before retouching. Paint on the mask rather than erasing the original pixels. Black hides, white reveals, and intermediate grey preserves partial transparency. Protect intentional white parts and useful smoothing; inspect on white, dark grey and a saturated colour.
-
Save and export separately. Hide the temporary test backgrounds, save an editable project such as XCF, then export PNG with alpha transparency. Reopen that exported PNG and repeat the three-background test.
Removing a background cannot recover detail missing from the original raster. A pale fringe may require edge-colour correction or a cleaner source file; a mask alone cannot undo pixels blended with the old background.
How do you export a transparent logo in LogoSaga?
Create or refine your logo, then open the export controls. Choose the light or dark variant based on the surface where you plan to place it; these are artwork variants, not proof of the background setting. Select transparent for the background, then download PNG for raster placement or SVG when the destination accepts a vector file.
The PNG width choices are 512, 1024 and 2048 pixels. Choose enough pixels for the intended display and verify the finished dimensions; the logo’s proportions mean the file is not necessarily square. The solid background option deliberately includes a background. If you selected it by mistake, return to the design and export with transparency instead of trying to erase the downloaded canvas.
LogoSaga’s SVG export renders the logo without a painted background when transparency is selected. Its transparent PNG export rasterizes without a background fill. This applies to artwork created in the editor. It is not an upload service for cleaning an existing logo, and it does not automatically turn an imported PNG into a vector.
Does resizing affect transparency or sharpness?
Downscaling a suitable PNG is usually preferable to enlarging a small one, but every raster resize can change edge pixels. Repeatedly resize from the original rather than from the last reduced copy. Enlarging a 100-pixel logo to 2048 pixels cannot recover the detail that was absent from the 100-pixel source.
For clean new dimensions, export from the original SVG or logo design. Vector geometry lets the renderer calculate edges at the chosen size. Still inspect the actual small result: a sharp vector can contain strokes or letter spacing that are unsuitable at tiny sizes. Transparency solves compositing, not all problems of logo legibility.
What should you check in the destination?
Upload or insert the final file into the real website, presentation or document and preview it there. Some services flatten transparent images, use a background of their own, or crop the canvas. If the local three-background test succeeds but the uploaded image gains a box, check that destination’s processing and requirements before editing the original again.
For a Google Business Profile logo, use the accepted raster formats and test the square composition; transparency is optional. Keep clearly named light and dark versions, retain the SVG source and record the intended use. The logo file checklist helps keep these exports distinct so the next person chooses a compatible file.
Related practical guides: Logo testing checklist: 10 checks before you launch
Create a logo and choose a transparent PNG or SVG exportFrequently asked questions
Why does my PNG logo have a white background?
The file may contain opaque white pixels, or the viewer may display transparency on white. Place the actual file over a coloured surface to distinguish these cases.
Does a checkerboard prove that my logo is transparent?
No. A checkerboard is often a viewer aid, but it can also be baked into the image. If the squares remain when you move the logo onto another background, they are actual pixels.
Is SVG always transparent?
No. SVG can contain a background rectangle or other painted shapes. Export without a background and test the file in its intended destination.
How do I remove a white outline around a transparent logo?
Re-export from the vector original without a background. If only a flattened raster exists, carefully repair its edge colours in an image editor; simply deleting more white pixels may damage the logo.
Can LogoSaga remove the background from an uploaded logo?
This guide covers logos created in LogoSaga and their export choices. LogoSaga is not an upload-based background-removal or PNG-to-SVG conversion tool.